Struggling with Push-ups?
I hear you! Push-ups are hard! They also tend to be one of those exercises that people love to hate.
I have a theory that this is due to:
1. Most people learn push-ups in grade school and are not coached properly. It is much harder to unlearn something then it is to start with a blank slate.
2. Push-ups are often used as form of punishment in grade school. Late to practice or the team makes a mistake, do *insert ridiculous number here* push-ups. Of course this would make people hate push-ups, why would we ever like an exercise that was only used to punish us in the past?
3. If used as punishment most kids (and adults for this matter) will just want to get them over with as fast as possible. Who would care about their form if they are only praised for finishing 1st and if finishing push-ups means they get to go back to participating in an activity they love!
4. This behavior translates to our adult lives, we avoid push-ups at all costs. This means that we don’t practice push-ups. How can you possibly get better at a skill without proper coaching, proper technique, and loads of practice.
In this blog post I am going to break down a few tips that you can do to start improving your push-ups. I will answer some of the common questions I am asked such as: is it better to do them off yours knees, how low should I go, what about my elbows?
So lets get to it!
How to Modify a Push-Up
If you are not able to do a push-up off the floor, a great option would be to modify your push-ups. There are two ways to modify a push-up. Option one , and my usual recommendation, is to place your hands on an elevated surface like a sturdy bench, table, step etc. Option two is to perform push-ups off your knees, I usually only suggest this option if your in an environment where there is no option to elevate your hands (think group fitness class, outdoors, etc.).
Hands Elevated Push-ups
Modifying the push-up by elevating your hands is my preference over modifying the push-up by lowering your knees. I have found that when people elevate their hands they are able to maintain a better body position and stay connected through their core. I also have found that this modification progresses to performing a push-up off the ground faster. Below are a few tips for performing hands elevated push-ups.
Place your hands just outside and slightly above your shoulders.
Make sure your don’t arch your back in the starting position or throughout the push-up. If you find you are struggling to maintain a flat back, try placing your hands on a higher surface until you are able to maintain a strong core position.
Look right in front of your hands, don’t allow your head to drop.
Make sure your hips come with you during the push-up, don’t allow your hips to stay up in the air as your lower into your push-up. Squeezing your glutes throughout the push-up can help to make sure your hips come with you as well as help to maintain a strong core and flat back.
Lower your body until your arms are roughly parallel to the floor or lower if your range of motion allows for this. If you can’t lower yourself with control to this depth then try to find a higher surface (counter top, table, wall etc.) to place your hands so that you able to practice with full range of motion.
2. Push-ups From Knees
Performing push-ups from your knees could be a good option if you are in a situation where you don’t have the option to elevate your hands. When performing this modification, we still want to try to maintain the a similar as possible body position to a push-up from the floor. Here are a few tips.
Place your hands just outside and slightly above your shoulders.
Even though you are on your knees I still want you to think about maintain a strong core as if you were in a plank on your hands.
Try to lower yourself to into a position where your biceps/arms are parallel to the floor.
Make sure your don’t arch your back in the starting position or throughout the push-up. If you find you are struggling to maintain a flat back, try placing your hands on a higher surface until you are able to maintain a strong core position.
Do not rock back and forth into the push-up. Maintain a straight line from your shoulders to your knees.
Make sure your hips come with you during the push-up, don’t allow your hips to stay up in the air as your lower into your push-up. Squeezing your glutes throughout the push-up can help to make sure your hips come with you as well as help to maintain a strong core and flat back.
Setting Up Your Push-up:
Hand Placement and Elbow/Shoulder Alignment
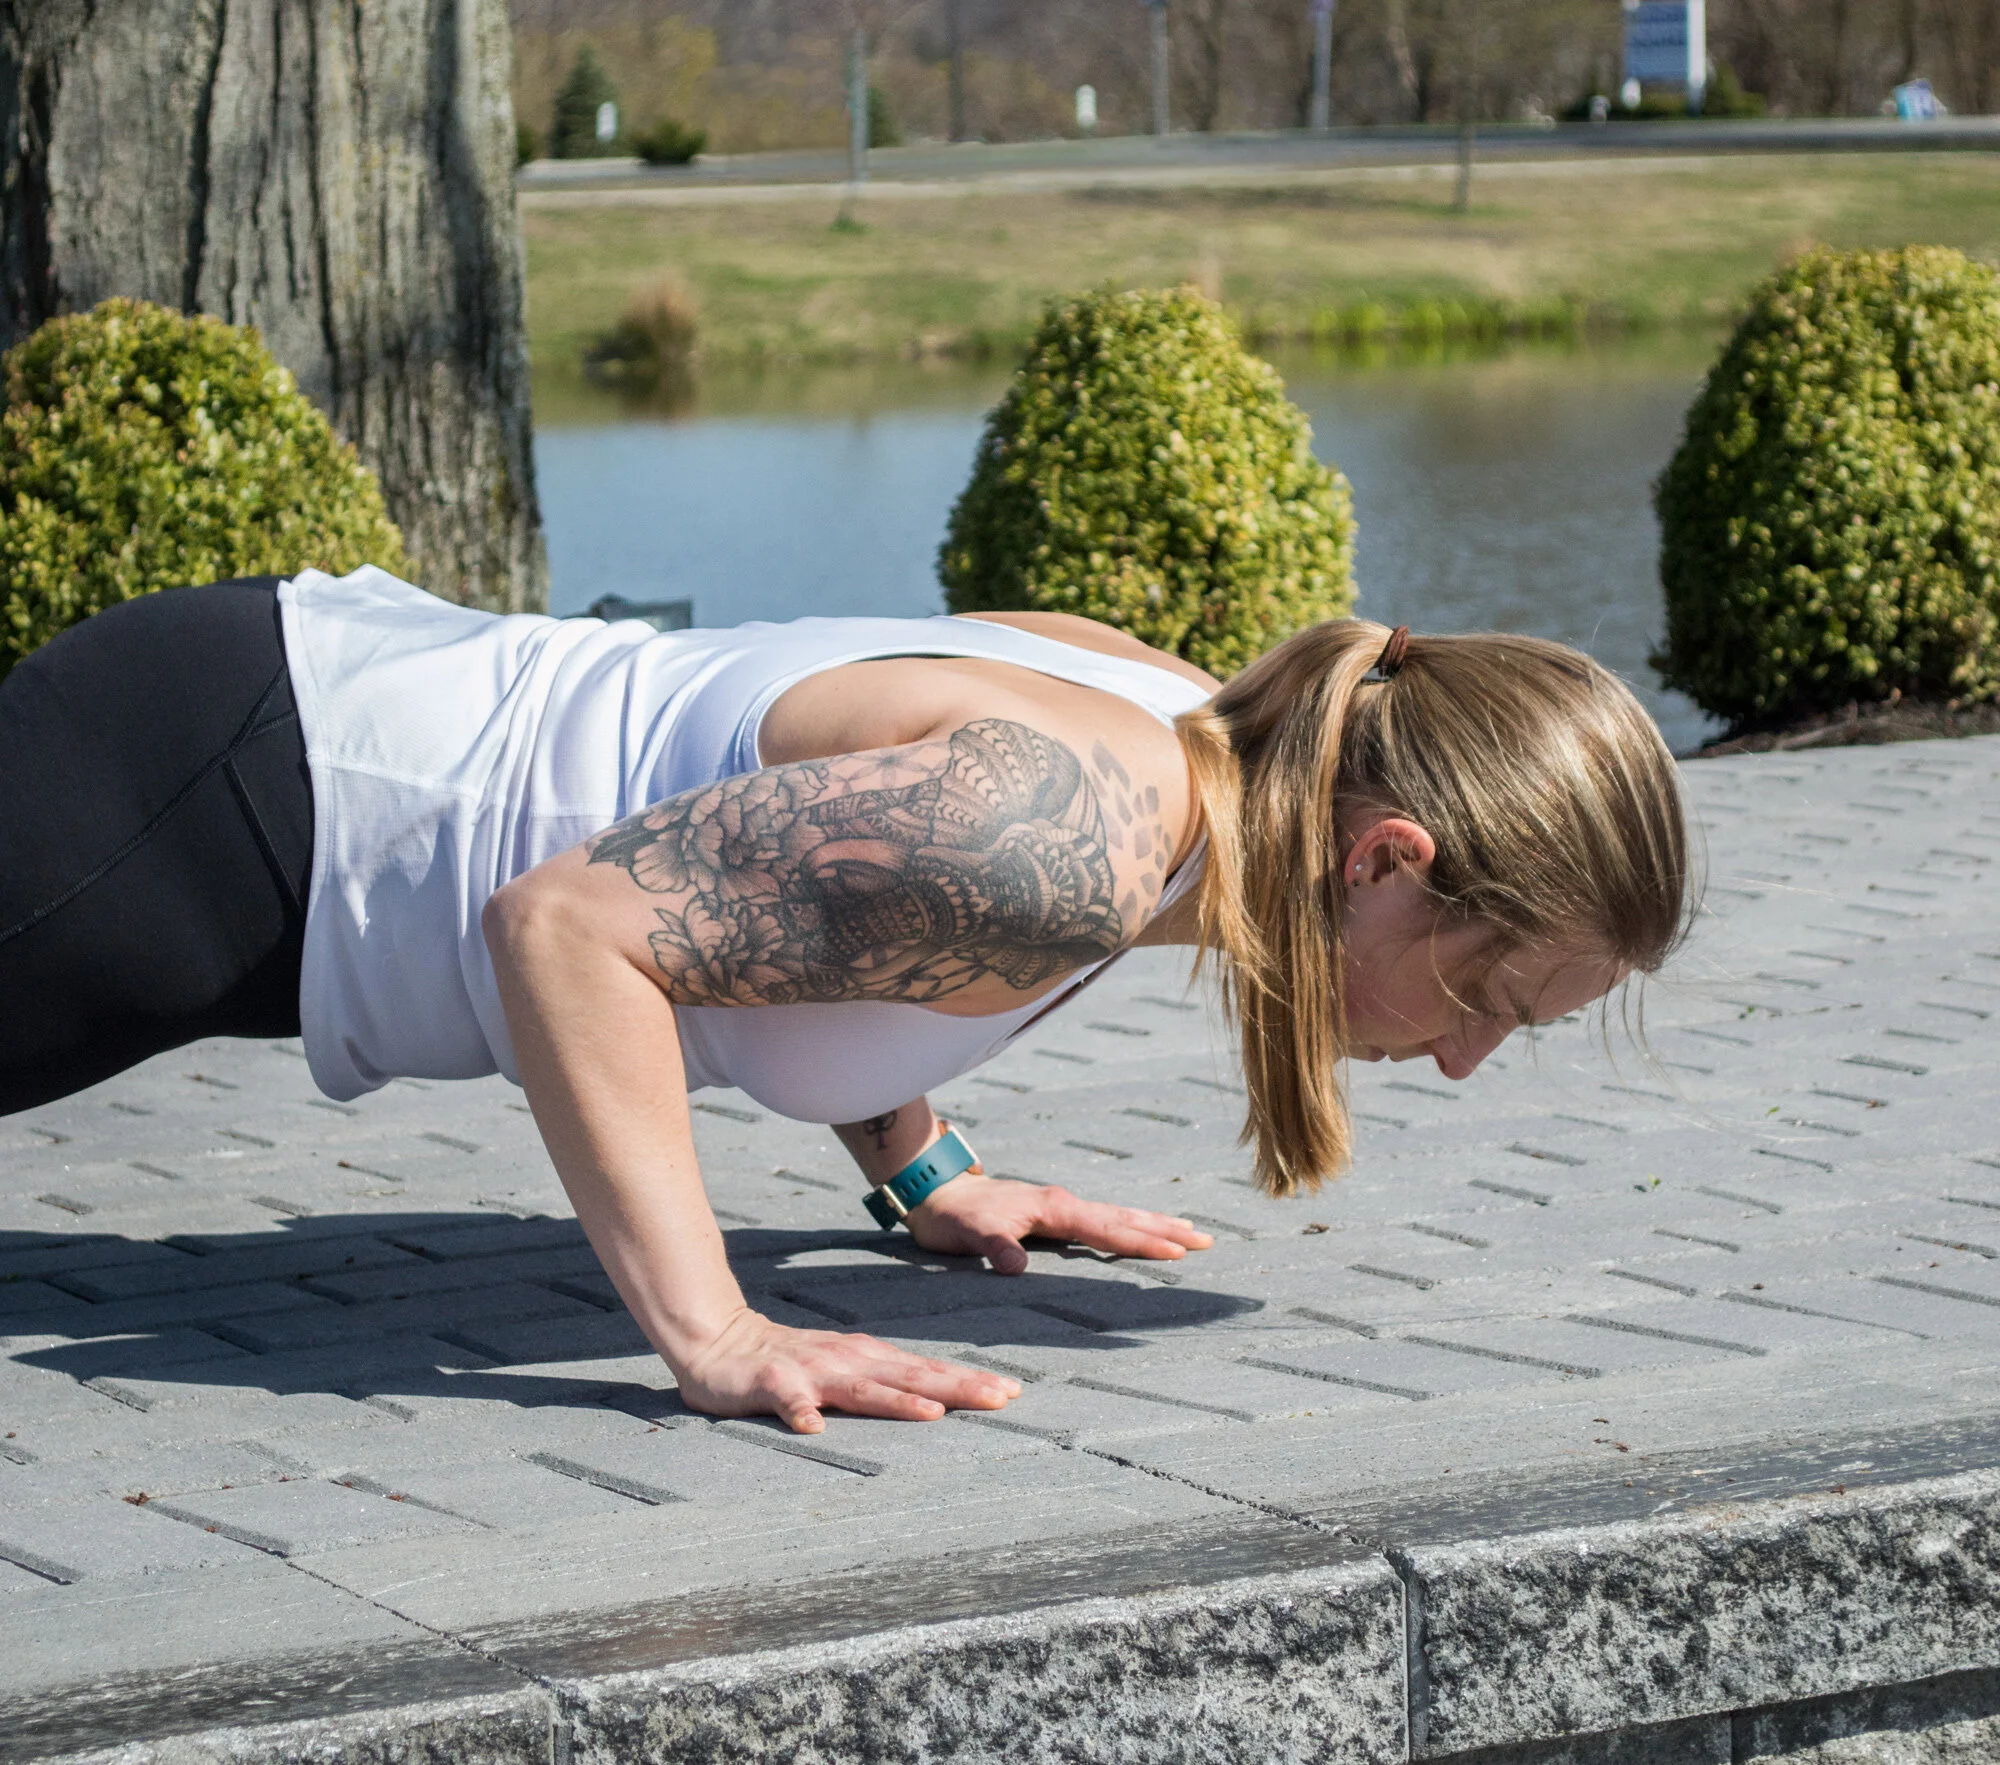
Taking the time to have a strong starting position will greatly improve your success during push-ups. While there a few different hand placement options depending on the type of push-up you are performing, for the this blog we are looking at the hand placement for a standard push-up. Below are a few tips to help you have a strong push-up set up.
Hand and Foot Placement
While this will vary slightly from person to person, placing your hands just outside and slightly in front of your shoulders can help to create a strong base. One tip that I’ve learned is to place your hands slightly in front of your shoulders, as opposed to directly under under your shoulders. This will provide more support for your upper body and can help to create a stronger push-up.
Lets not forget about those fingers! When performing your push-ups you want to think about gripping the floor through your fingertips. This will help to create more tension in your upper body and pull your shoulders into a strong position.
The more narrow your feet are, the harder the push-up will be. Having a wider foot push-up can help create a stronger base and therefore as stronger push-up. As you get stronger performing push-ups, you can choose to take a narrower stance to increase the difficulty.
Take your time to set up your push-up. Having a mindful step-up with your hand and foot placement will help improve alignment during your push-ups.
2. Elbow Alignment
A good cue that I learned years ago from Meghan Callaway is to think about making an arrow position with your arms and body. I often see push-ups being performed with elbows going out to a 90 degree angle making a “T” shape with the arms and body. Overtime this will put a lot of extra stress into your shoulders and neck. As you start to lower into your push-up think about that arrow position, keeping your elbows relatively inline with your forearms.
3. Shoulder Alignment
A strong shoulder position is key to performing strong push-ups. One think that I often see (and that I struggle with myself) is the front of the shoulder rolling forward in the bottom of the push-up. A tip that I learned from Dr. Cody Csontos to help with this is to externally rotate or “pack” your shoulders BEFORE lowering into your push-up. To pack your shoulders think about twisting a door knob with your hands and pulling your armpits down to your hips. This position will help to create a strong starting point which will help your shoulder blades move back and down when performing your push-up, instead of rolling forwards.
We also want to think about squeezing our shoulder blades together when performing a push-up. Our shoulder blades should not remain in a fixed position during the push-up, they are meant to move. Think about rowing your body towards the floor and then pushing it away to return to the starting position.
Push-up Variations For Better Push-ups
Once you’ve mastered your push-up set up, here are a few example of push-up variations that you could use to help improve your push-ups.
Negative (Eccentric) Push-ups
In this exercise we are working on developing control and strength during the lowering (eccentric) portion of our push-up. For this variation, after lowering, you can return to the starting push-up by pressing up through your knees (as shown) or if you are looking for a more advanced variation you can press up through a full push-up position (straight legs). This variation can also be performed with your hands on an elevated surface.
2. Up/Down Planks
I like this exercise for increasing our push-up strength because it is simultaneously strengthening our core and our single arm pushing strength. When performing this exercise, try to keep your hips as square as possible (no excess shifting or rocking from side to side), make sure your hips are coming with you (don’t leave your hips up in the air), and make sure you are leading with both arms (don’t perform the press up all on one side and forget about the other arm). This exercise can be practiced off the floor (as shown), off your knees (as shown), or off an elevated surface like a bench, table, wall, or chair.

